Results 1 to 19 of 19

Thread: Can Tire Marks be Removed from this Coral Red Premium Leather of a 2008 BMW 328i, coupe?

Hybrid View

Previous Post Previous Post   Next Post Next Post
  1. #1
    Join Date
    Feb 2012
    Posts
    564

    Default Can Tire Marks be Removed from this Coral Red Premium Leather of a 2008 BMW 328i, coupe?

    Can you please let me know if your products will remove tire marks on leather seats of my car?
    It is not dirt.
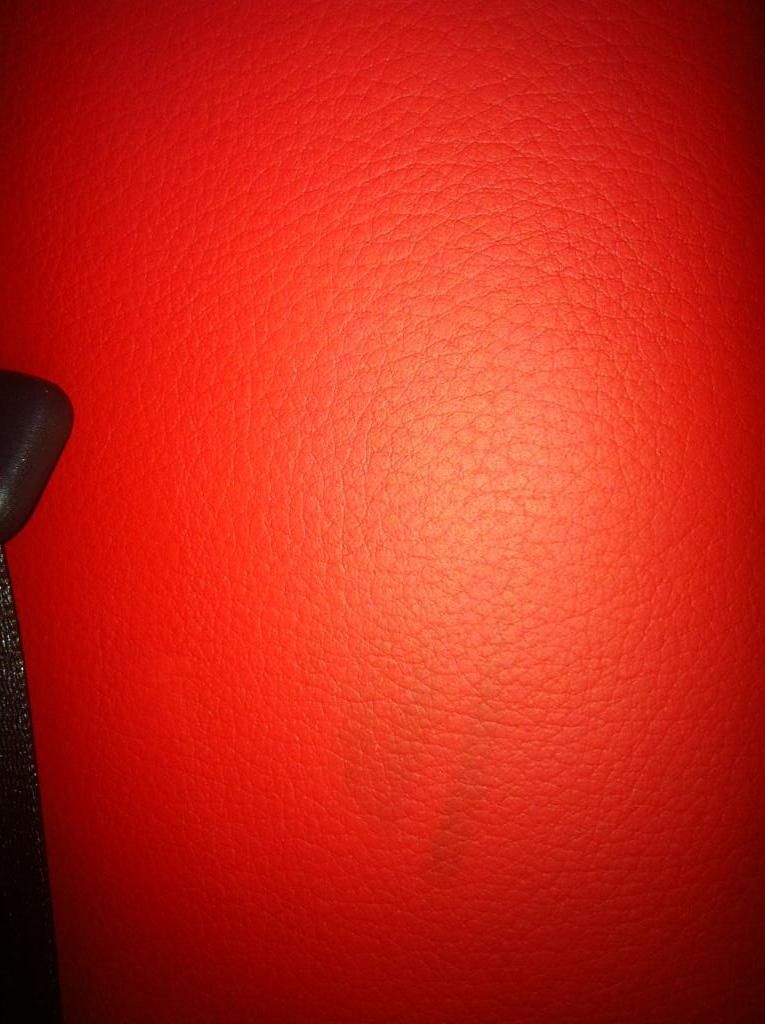
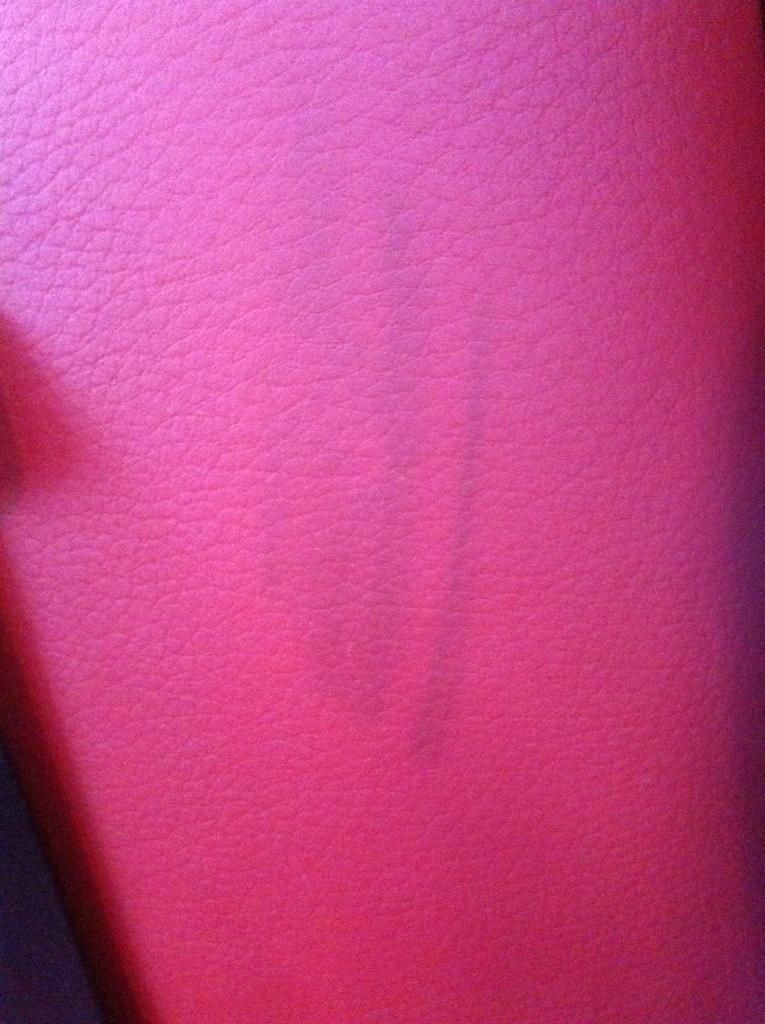
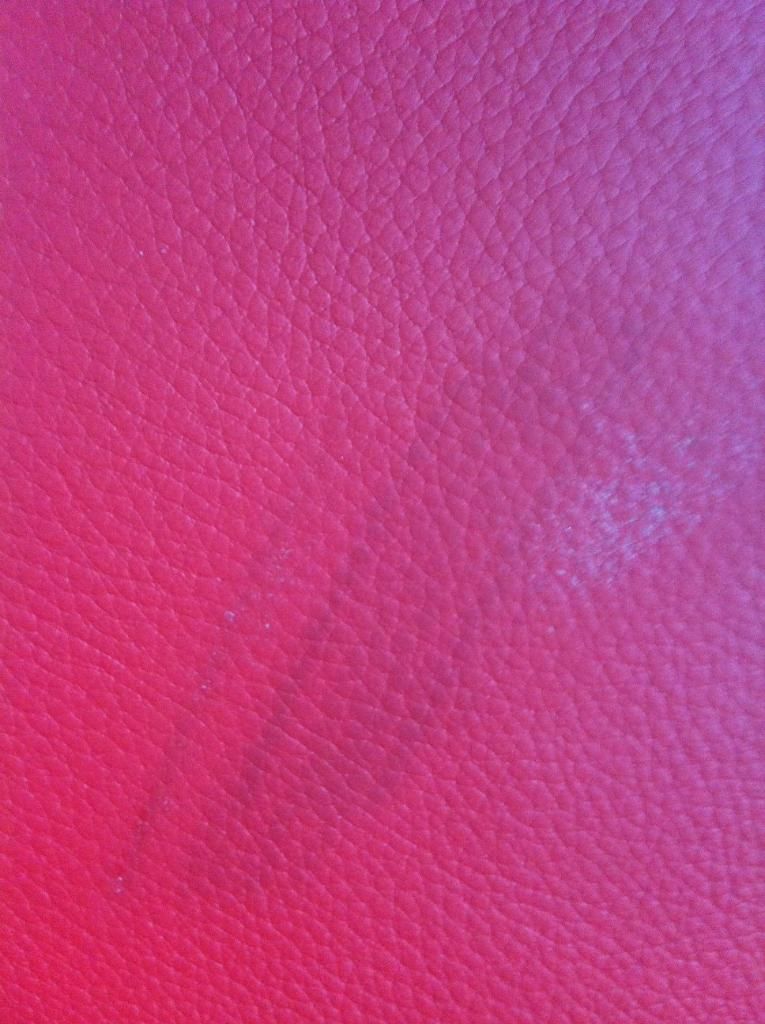
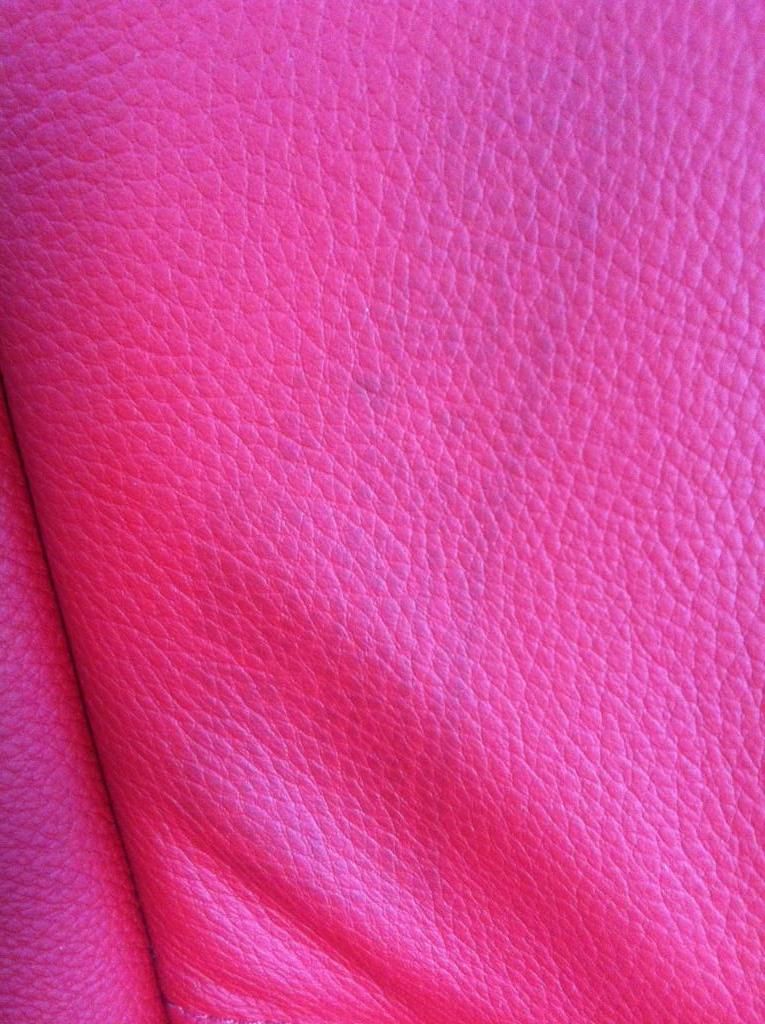
    It is from tire rubber.
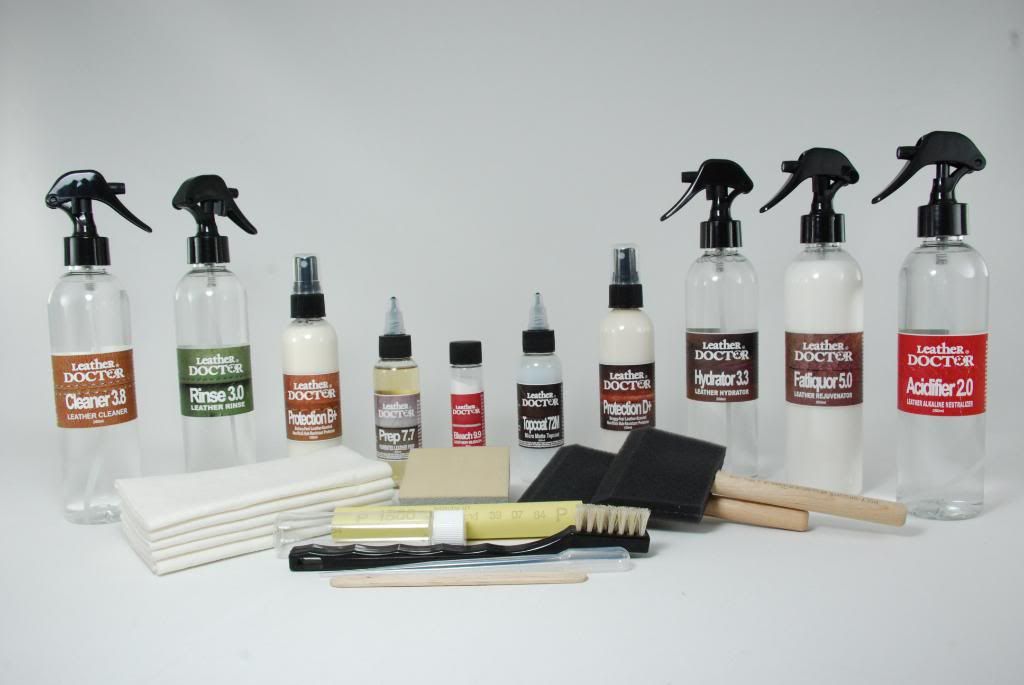
    Will leather Ink & Dye Stain removal Starter Kit do the job?

    Here are some pictures.
    Tires were in the car for 3 days in dark garage but then I transported them for installation and the car was sitting on the direct sunlight with the tires inside for about 7 hours.
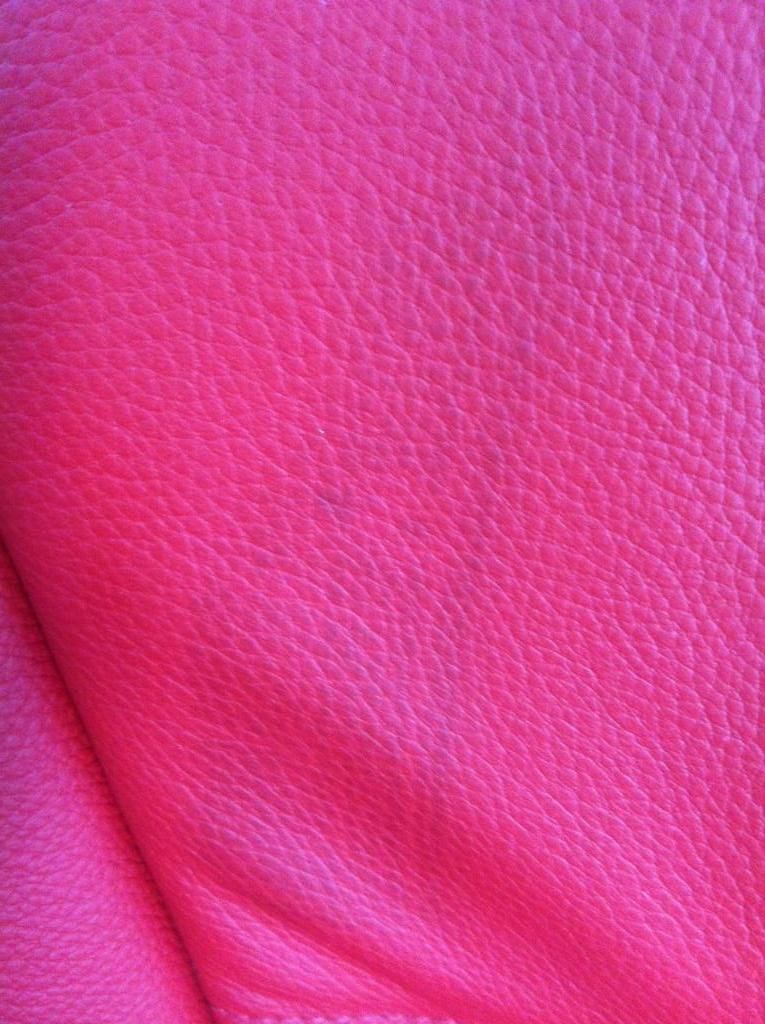
    I already tried to clean it as you can see on some part.
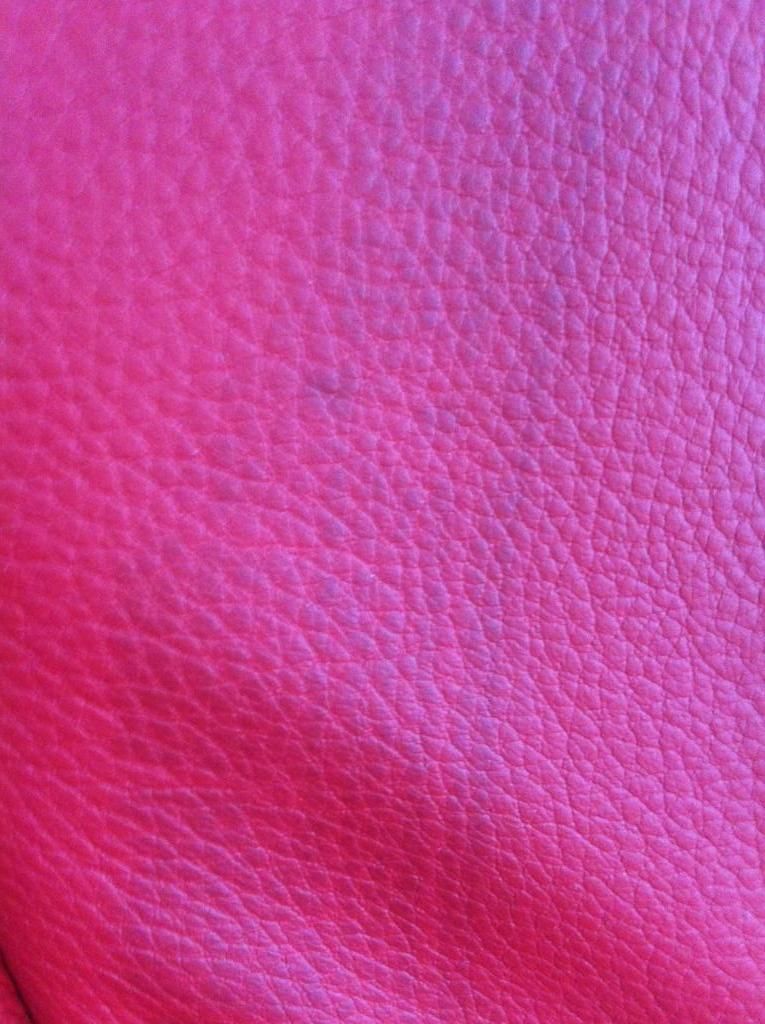
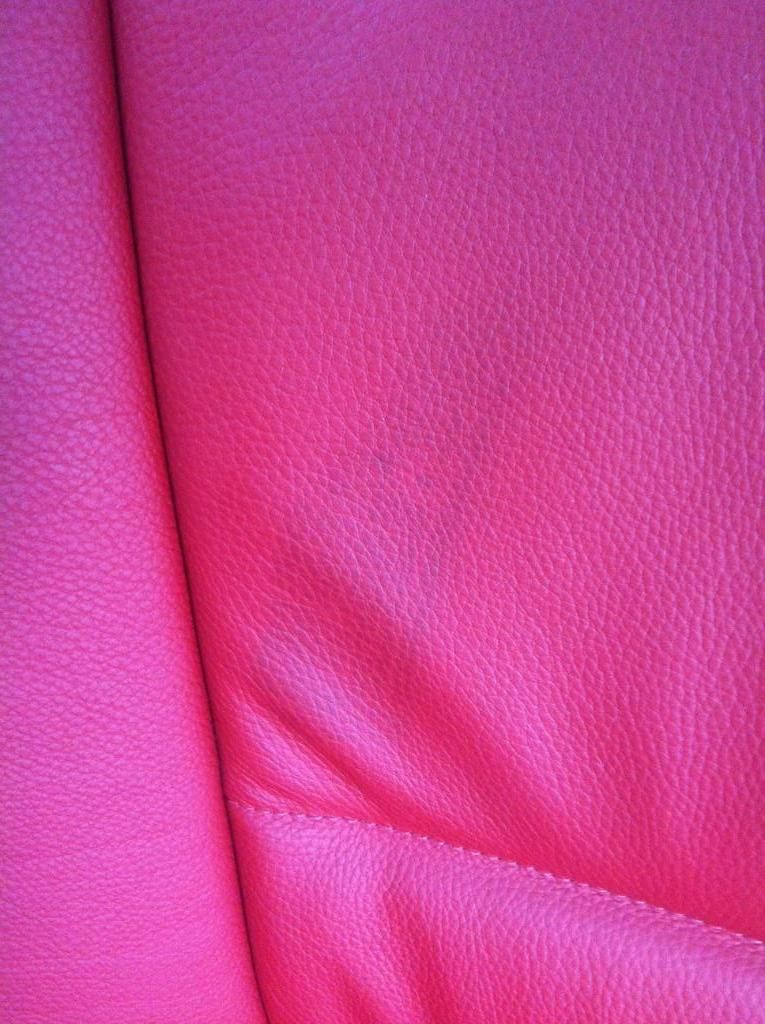
    Basically there are 3 separate marks on 3 different places.
    The leather is Coral Red premium leather for 2008 BMW 328i, coupe.
    So the leather is 4 years old.
    The tires were my first passengers sitting in the back seats since I bought the car.

    Please let me know what your suggestion is and what the % possibility of removing these marks successfully is.
    The question I have is when I start the process can I resume it later.
    I am busy during the week so only possible time is from Friday evening to Sunday evening.
    Or I can start any working day right after work but I won’t be able to check the progress until next day evening.

    About the products I have used, BMW leather cleaner, soapy water, alcohol (nail polish removal), WD-40 and HONDA cleaner.
    I only tried it on center arm rest so
    Just in case of damaging the leather surface I can buy the OEM replacement part.

    Ok, let’s do it then.
    I was concerned because I read the link with the plastic bag issue and every 4 hours you asked the guy to check the progress.
    If I don’t overdo it to let the application work while I am at work then I am ready.
    Anyway first I’ll apply it on the center arm console so if any damage occurs I can buy the replacement part.
    That’s the mark (my starting point) which I am resending now, (if you rotate the picture 90 degrees you’ll see the damage on the right).

    Please let me know.

    Dusan.


    #A


    #B


    #1


    #2


    #3


    #4


    #5


    #6


    #7


    #8
    Last edited by Questions!; 08-13-2012 at 09:01 AM.

  2. #2
    Join Date
    Feb 2007
    Location
    Greater Vancouver, Canada.
    Posts
    5,130

    Default

    Let me know when you are ready to start with this Kit Ap5.di


    Leather Doctor® - Auto Pigmented Leather – Topcoat Refinisher - Dye and Ink Stain Remover - Kit Ap5.di

    Roger Koh
    [email protected]

  3. #3
    Join Date
    Feb 2007
    Location
    Greater Vancouver, Canada.
    Posts
    5,130

    Default

    Let start at the partially damaged “center arm console”.

    Take note the technical difficulty when working on a vertical panel as the Prep-7.7 tends to flow downwards.

    1] Apply Prep-7.7 to stain avoiding the damaged areas.

    2] Cut out the paper rag slightly oversize, place over it and allowing the Prep-7.7 to wet through; otherwise add onto the paper rag.

    3] You may want to place extra dry paper rag beneath just to catch any drips and cling wrapped it.

    4] Check at the end of each day and change the paper rag with new application for the next 3 days and see the progressive result each day if any. This is plan A before going into plan B.

    Show some pictures of the application, otherwise it may be better to remove the seat and doing it horizontally.

    Roger Koh
    [email protected]

  4. #4
    Join Date
    Aug 2012
    Posts
    9

    Default

    Hi Roger

    I've decided to remove back seats and lay it down on the flat surface so the application wont drip. I'll update you with my progress.
    Last edited by Dusan; 08-20-2012 at 04:38 PM.

  5. #5
    Join Date
    Aug 2012
    Posts
    9

    Default

    Hello Roger
    Here are some pictures after removing seats and applying Prep7.7. Please let me know if the application amount is sufficient.
    DusanName:  photo-12.JPG
Views: 1123
Size:  1.92 MBName:  photo-11.JPG
Views: 1220
Size:  2.10 MB

  6. #6
    Join Date
    Feb 2007
    Location
    Greater Vancouver, Canada.
    Posts
    5,130

    Default

    Dusan,

    How long was the Prep-7.7 left to dwell on the stain?

    Do you think the Prep-7.7 has move the stain?

    Do you see any color of the leather on the paper rag?

    Tips:
    Do tests on a hidden area – cut a dime size paper rag, soak with Prep-7.7 and let it dwell to test out the strength of the leather finish.

    Do the same size tests over the tire stain and compare the result.

    The paper rag for the stain shown in picture #1 is too much oversize. The purpose of the cut out paper rag is to hold the Prep-7.7 over the stain; absorb the suspended stain instead of staying on the leather surface. When it becomes stain from the reverse transfer, a fresh on is replace until the stain is fully exhausted. If leather finish color shows on the paper rag , stop; if the leather darkens upon application, stop and clean off with Cleaner-3.8 follows with Rinse-3.0. Leather pH is further neutralized with Acidifier-2.0 by soaking it over with another cut out paper rag and dwell until it dries, testing with Acidifier-2.0 with finger should have a squeaky feel.

    Try to take better picture, so I know exactly what’s going on.


    Do a test on the damaged areas with a cut out (dime size), soak with Hydrator-3.3 and leave it on to observe if the leather darkens (easier to show pictures, please)?


    Roger
    Last edited by Roger Koh; 08-20-2012 at 07:46 PM.

  7. #7
    Join Date
    Aug 2012
    Posts
    9

    Default

    Hello Roger
    Answers to your questions.

    How long was the Prep-7.7 left to dwell on the stain?
    6 hours

    Do you think the Prep-7.7 has move the stain?
    Not at all

    Do you see any color of the leather on the paper rag?
    Not at all

    After 6 hours the oversize paper rag was completely dry and leather also. I cut a dime size rag and applied Prep-7.7 on the tire stain area. Here is the picture.
    Interior lights and iPhone4 is not a good combination when taking picture. Please let me know if you have any suggestions I already tried many angles and flash no flash
    combinations.
    Name:  photo(16).JPG
Views: 1166
Size:  626.0 KB

Thread Information

Users Browsing this Thread

There are currently 1 users browsing this thread. (0 members and 1 guests)

Tags for this Thread

Posting Permissions

  • You may not post new threads
  • You may not post replies
  • You may not post attachments
  • You may not edit your posts
  •