Hi Roger
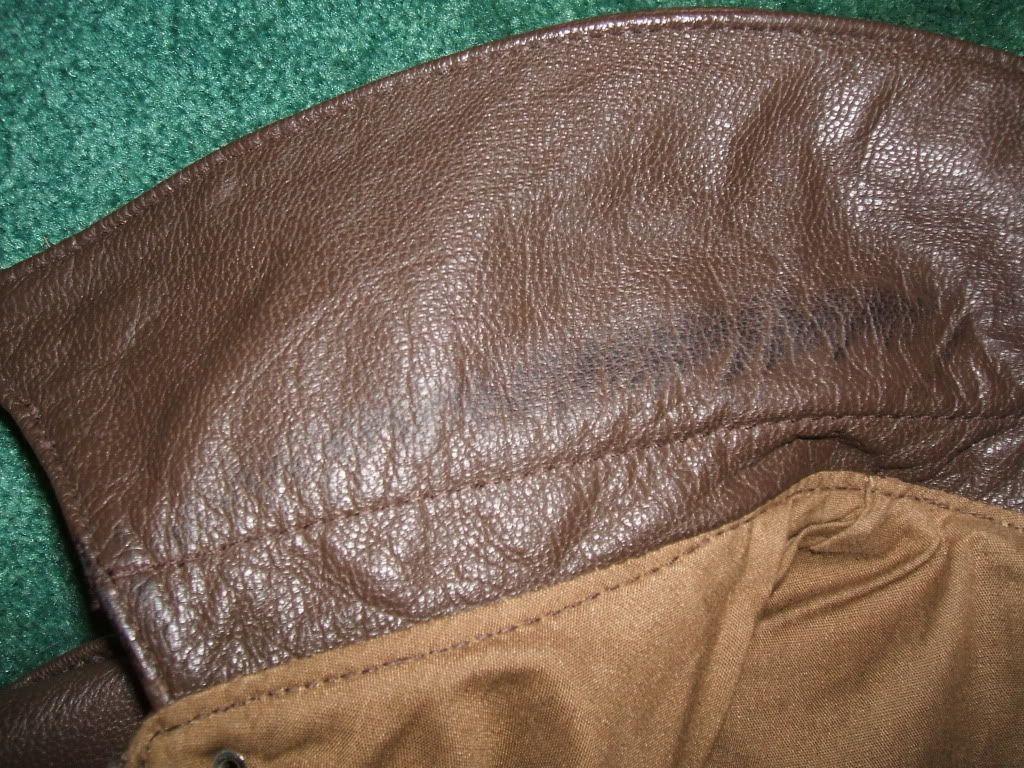
I noticed a black stain on the inside of the collar. It only really shows when the light is right. It doesn't seem to be oily or greasy but I suppose it was caused by sweat. What do you suggest for cleaning?
Thanks,
Gary


 Junior Member
Hi Roger
I noticed a black stain on the inside of the collar. It only really shows when the light is right. It doesn't seem to be oily or greasy but I suppose it was caused by sweat. What do you suggest for cleaning?
Thanks,
Gary
Senior Member
This is some stain that we should not over clean it as the finish may have been weaken from this soiling contamination and may reveal any damages after the camouflaging stain is removed; nor do we under clean it.
Finish identification will help us determine the proper selection of the most suitable process to remove them safely. Therefore an absorbency test with a drop of water to the stain and to the surrounding areas to determine how they response will be the first step.
Show us some test pictures and I shall explain further from there
Roger Koh
[email protected]
Tomorrows leather care Technology delivered Today!
Junior Member
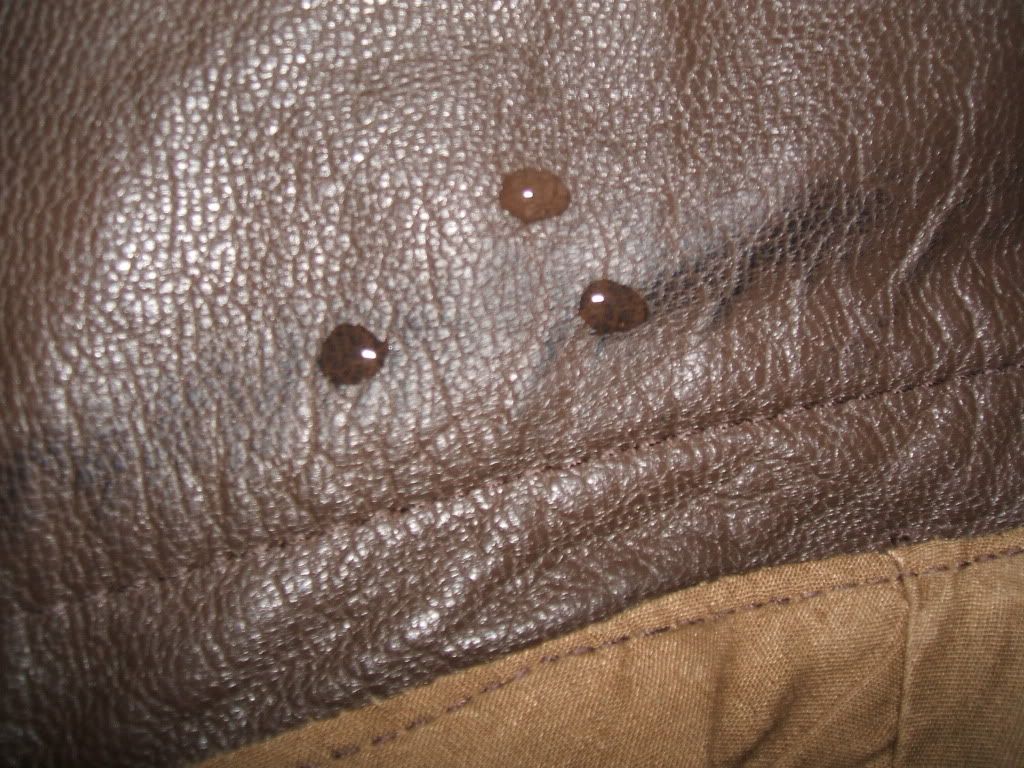
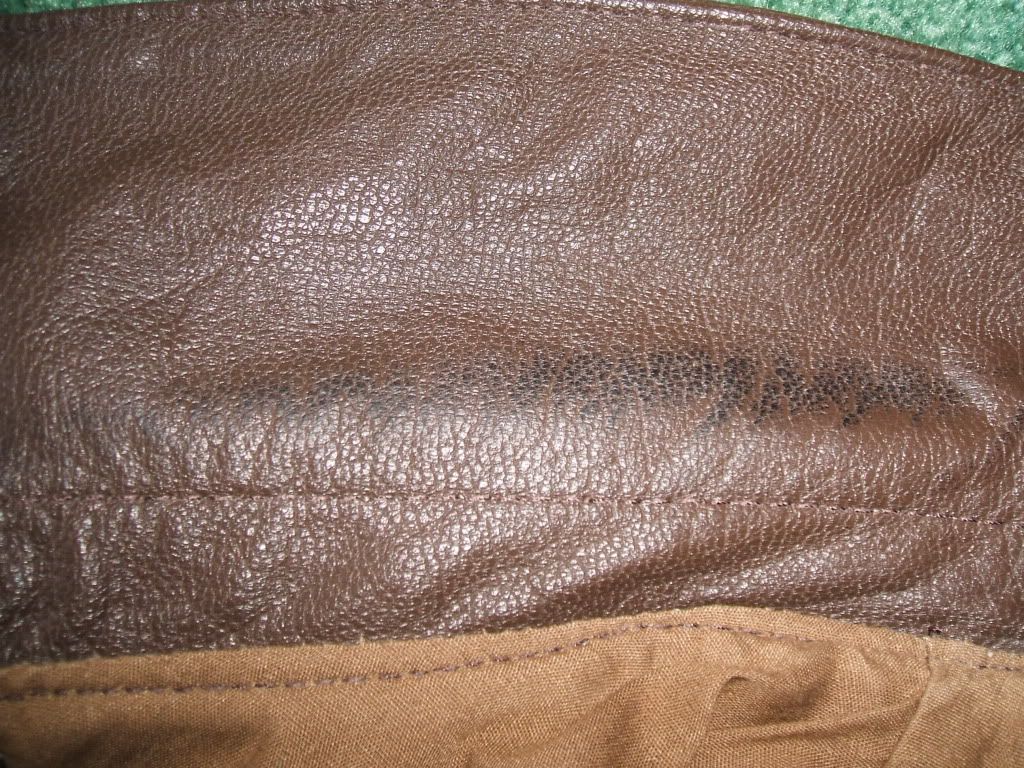
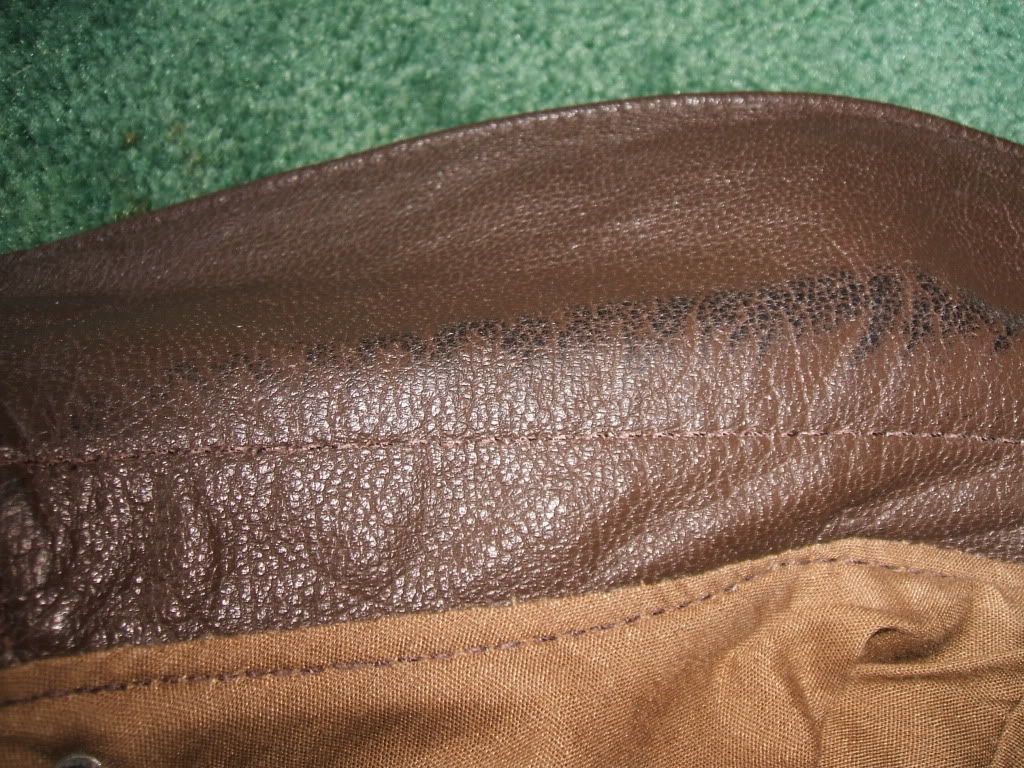
The first picture is 5 minutes after putting 3 drops, one above the stain, and two on the stain. They are the same as when I first put them.
The next one is 15 minutes later (20 min total). The drop above the stain is partially absorbed,
but the two on the stain have been completely absorbed to become invisible.
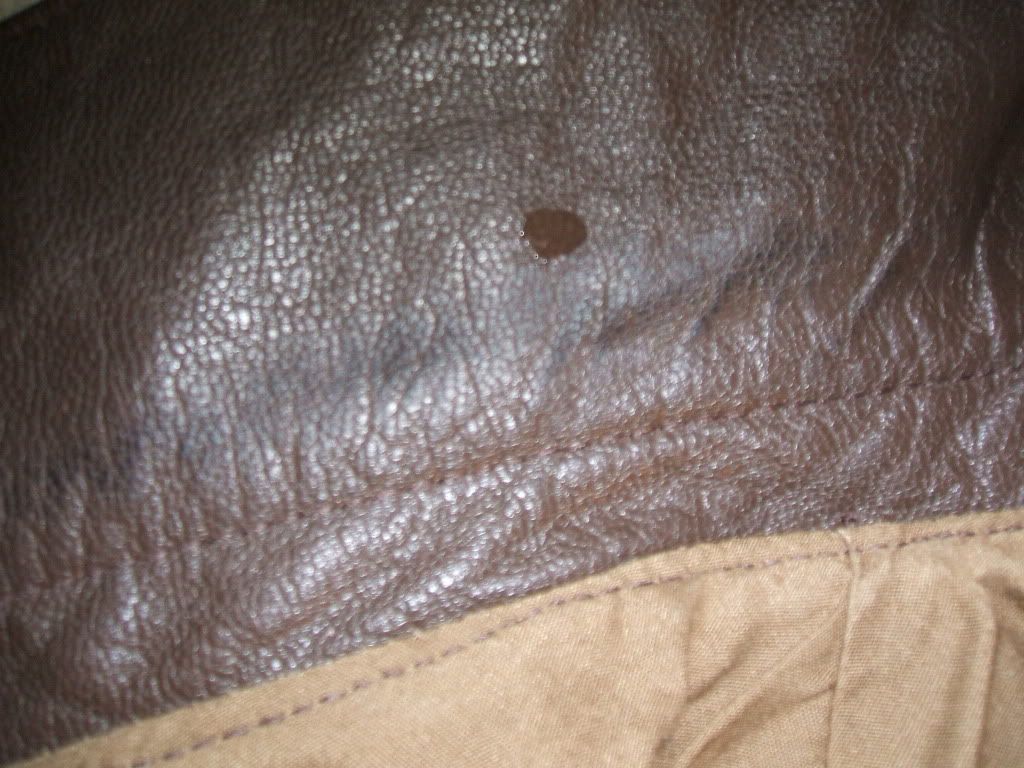
This one is also at 20 minutes, and in better focus.
Senior Member
The test shows that the topcoat is partially damaged and ought to be replaced after complete removal of the sweat stain. At this point we do not know if the colorcoat has also been weaken and care should be taken so as to avoid over cleaning it and removing the weaken colorcoat at the same time.
The recommended cleaning process is as follows:
Step-1 Gentle Cleaning:
Use Cleaner-3.8 > Rinse-3.0.
Test clean by applying Cleaner-3.8 onto the horsehair Brush-1, agitation and extract with towel avoiding the rubbing action. Dry with hair dryer to inspect soiling appearance. If not satisfactory repeat, otherwise proceed to the next step.
Step-2 Prep Cleaning:
Use Prep-7.7 > Cleaner-3.8 > Rinse-3.0
Test clean as above step 1. All surface stain should be gone; however has to be gentle as not to remove the weaken finish; otherwise color refinishing is inevitable.
Step-3 Degreasing:
Use Degreaser-2.2 > Rinse-3.0
When Prep-7.7 cleaning reveal that colorcoat is damaged and stain is penetrated; Degreasing is necessary to remove stains from within the leather structure.
Step-3 Leather Rejuvenator:
Use Hydrator-3.3 > Fatliquor-5.0
Step-4 Topcoat Refinish:
Use Micro Topcoat-72S (satin) or a mix of gloss and matte to match original luster. Hopefully no weaken colorcoat is removed during the cleaning process.
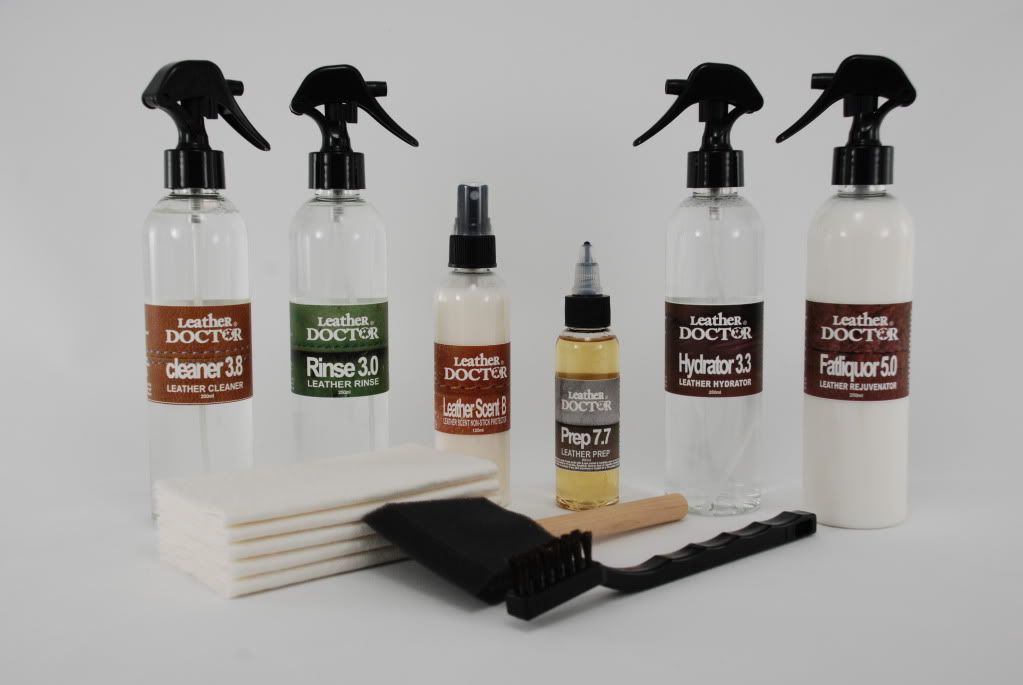
Heres the Semi-Aniline Kit-SA3, products mentioned not found in this kit can be add-on to it.
Leather Doctor® Semi-Aniline Leather Care Kit-SA3
Contents:
Prep-7.7 - 60ml
Cleaner-3.8 - 250ml
Rinse-3.0 - 250ml
Leather Scent-B - 120ml
Hydrator-3.3 - 250ml
Fatliquor-5.0 - 250ml
Leather (horsehair) Brush-1 - 1pc
3 Poly-Brush® - 1pc
Washable Rags - 5pcs
Roger Koh
[email protected]
Junior Member
Hi Roger,
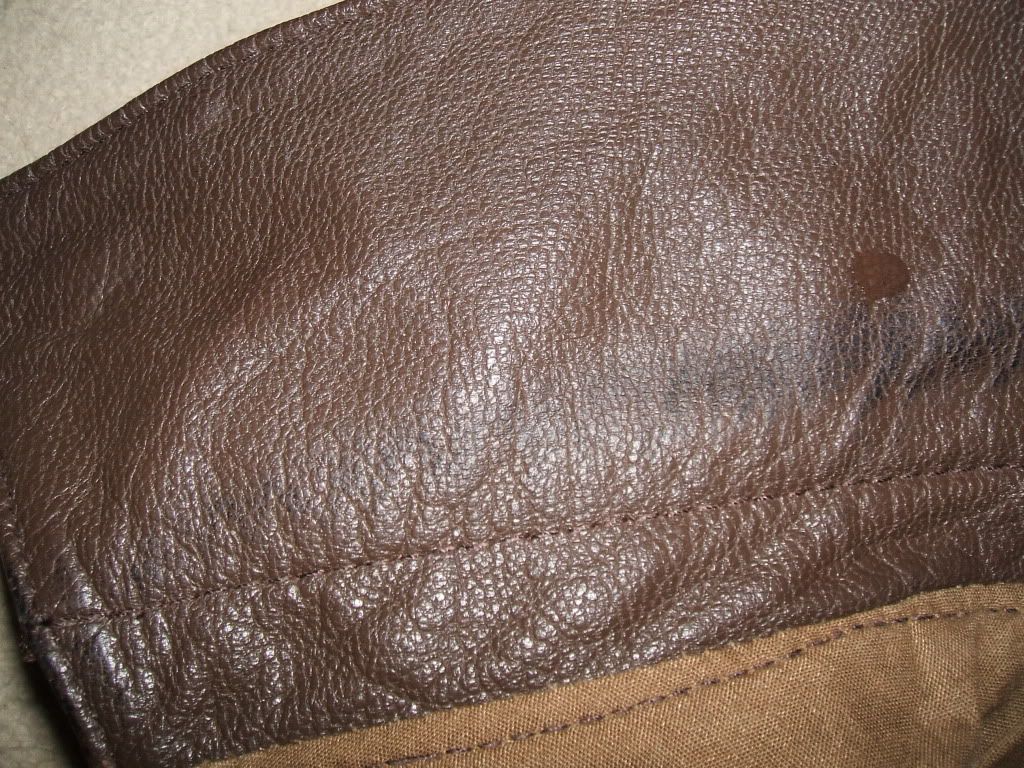
Here are photos taken after cleaning with Cleaner-3.8 and Prep-7.7. It looks about the same to me. I can't really tell whether the stain is only on the surface. I have the impression that has not penetrated, because only the "tops" of the texture are black, not the fissures between them. You can see that somewhat in the photos but under a magnifying glass it's very apparent.
Thanks,
Gary
Senior Member
Place a drop test of Prep-7.7 onto the stain and leave it to dwell about an hour thereafter Clean off with Cleaner-3.8 using horsehair detail Brush-1 for agitation and towel extraction follows by rinse.
If the result is not satisfactory, place another drop on the same location and let it dwell overnight; thereafter cleaning, extracting and rinsing as above.
Show us the result and we can go further from there...
Roger
There are currently 1 users browsing this thread. (0 members and 1 guests)
 Posting Permissions