Results 1 to 23 of 23

Thread: My First Post and first "real" leather treatment project on my BMW 335i

Hybrid View

Previous Post Previous Post   Next Post Next Post
  1. #1
    Join Date
    Dec 2010
    Posts
    15

    Default My First Post and first "real" leather treatment project on my BMW 335i

    Hi Guys,

    My buddy Anvar (ajvee) recently got a leather doctor kit and to say he had praised it's ability to rejuvinate the leather is an understatement. I felt his steering wheel and the bolsters where he had spent some time with, and I immediately noticed the difference. The leather restoration made the leather how it should be and feel. I also like how these products actually treat the leather, not just give a nice topcoat and fragrance.

    Prior to this I have been using Zaino Z10 leather "treatment", which I was impressed with. The fragrance was actually what I liked the most; Other than that, it performed as well as the other leather treatment oils I've used.

    So with Anvar's enthusiasm, he let me borrow the kit to see how it would work on my car. Now let me give a bit of a background on the leather seats in my car. All the leather in is in perfect condition, meaning there are very few cracks, no stains, and all around new condition. However, It is the lowest-quality leather that BMW makes that is still a real leather. As a low quality leather, it feels more like aligator skin; rough, firm, and having no "depth" to it. In other words, it feels very cheap and plastic-y. It is much different than Anvar's seats which are top-quality leather that BMW makes..it is soft, smooth and feels how leather should feel. My steering wheel is actually very high quality leather, similar to Anvar's. Half of it is perforated, half is smooth. The armrest is also high quality leather. They have become very shiny, which makes sense because I'm a grease monkey--always working on cars/motorcycles/engines..and don't always wash my hands before driving.

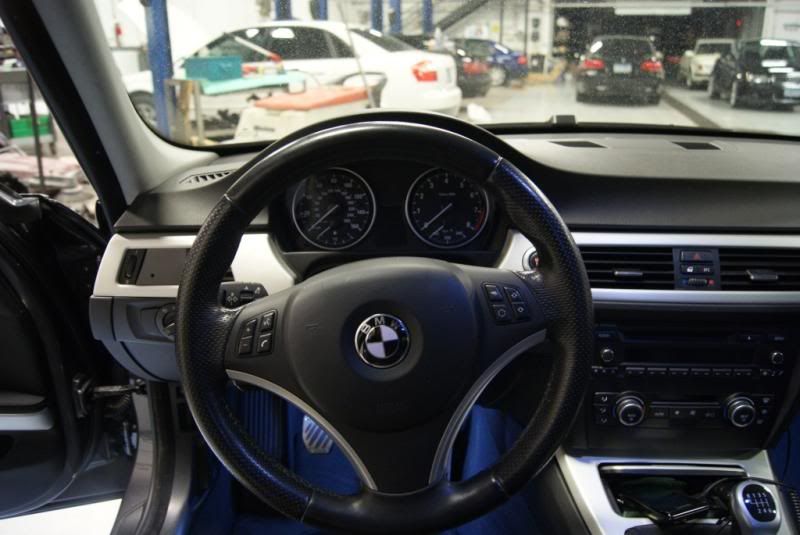
    Here is the wheel before

    Name:  Wheel Before1.jpg
Views: 12
Size:  57.2 KB


    So I began to use the Prep 7.7 on half of the steering wheel, side bolsters and armrest. I appled the prep liberally, then wrapped with cling wrap and left on for around 24 hours. The cling wrapping was harder than I expected, haha.

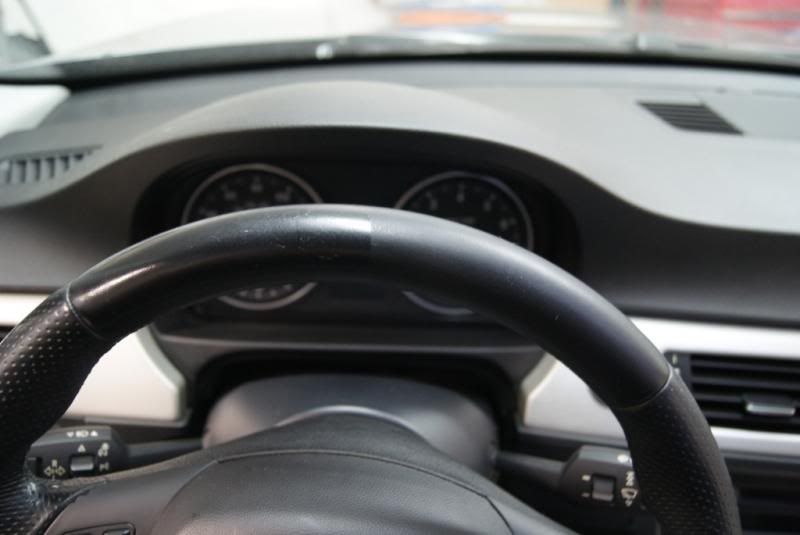
    When removing the cling wrap on the steering wheel and beginning to use the Cleaner, I immediately noticed the difference in appearance. It was matte finish, compared to very shiny. It was still a bit sticky to the touch, but a few more cleanings and rinses took care of it. I wish pictures could show how much of a huge difference the feel of the leather is...it's truly amazing. The seats notice the largest difference...as it went from plastic aligator skin to soft supple leather. Although there wasn't a very noticeable change in appearance, the change in feel was incredible. The texture and feel of the leather after prep and cleaner is exactly how I wish the leather would feel.

    Here are a couple of pictures of the after effects of the Prep 7.7 > Cleaner-3.8 > Rinse-3.0: The treated side is the right, original on the left (kinda obvious).

    Name:  Wheel After 1.jpg
Views: 12
Size:  37.1 KB


    Before:
    Name:  Wheel After 5.jpg
Views: 12
Size:  37.4 KB

    After:
    Name:  Wheel After 6.jpg
Views: 12
Size:  35.9 KB
    After using the hydrator and fat liquor the leather became tiny bit more "slippery" but not much. Then, the satin top-coat brought it back to the non-slippery, soft supple perfectly textured leather...moreso than before the hydrator. The Leather Scent was a great topping, giving a really nice fragrance and leaving the perfect texture.

    I intendid on only using a small bit of Anvar's kit..but after getting a taste of it, I want to keep going and do it on all of the seats.

    Thanks for developing such a great set of products! Another thing that really impressed me was Roger's knowledge on the chemical and scientific properties of leather and what is needed to treat that, and most of that I read in Anvar's post particularly. I always figured the cleaners were some generic softer cleaner, and the lotion was a generic fatty lotion with a leather fragrance. So to hear all the pH levels, acidic properties, hydrating and fatliquor times coming into play, it is clear Roger really knows his stuff...so for that, Thank You.
    Attached Images Attached Images  

  2. #2
    Join Date
    Dec 2010
    Posts
    15

    Default

    Also I have a question on when to apply the fatliquor after the hydrator. In a couple parts, I currently have the Hydrator liberally applied with cling wrap over it for a few hours. In the other thread, it was in the order of Prep>Clean>Rinse>(Hydrator>Fatliquor)>top coat. Do the ()parenthesis mean I should mix the Hydrator WITH the Fatliquor and let it soak? Or am I right to think that I should wipe off the hydrator then apply the fatliquor?


    Thanks!
    Brian

  3. #3
    Join Date
    Feb 2007
    Location
    Greater Vancouver, Canada.
    Posts
    5,130

    Default

    What you are doing in stages is correct regarding the Hydrator > Fatliquor.
    If you have seen how ajvee hydrated his glove first; then thereafter fatliquored it again using similar technique.

    The Hydrator-3.3 serves a few functions:
    First is to neutralized our perspiration stains that contains traces of urea (that’s why perspiration has ammonia odors); it is this ammonia that damages the leather (it slowly shift the leather protein fibers anionic (-) that repels the anionic leather constituents, especially the fatliquor). Besides Rinse-3.0 and Acidifier-2.0 serves the same function to neutralize the perspiration stains on a regular basis. When doing so you will see that the needle holes and the perforated holes always stays round; otherwise split starts from these areas as the moisture transpire through these openings; and seams rips easily when the leather is weaken.
    (Over alkaline exposure result in leather tackiness and can be rectified by the stronger pH 2.0 Acidifier-2.0; healthy well pH balanced leather should have a squeaky feel after rinsing with Rinse-3.0).

    Second is to allow the distorted leather fibrils to relax; so that we can work out the creases caused by collapsing of the leather structure just like a creased cardboard back to its original fullness while still damp.

    Third is to float foreign particulates within the leather structure; and wick to the leather surface to be absorbed by towel while still damp or dry with horsehair brush to dislodge soiling in between the grains.

    Fourth is to ensure that the surface tension is reduced; as a preconditioner for fatliquoring to reduce patchiness or blotchiness.

    The optimum level for leather hydration is to press the leather while still damp and see moisture oozing out. In fact the longer the leather is dwell the better it will be; and can be left safely up to 3 days. (On the contrary you may also hear that water damages leather; that when dries it becomes cardboard hard – well the scapegoat to blame may be the water but actually the culprit to blame is the pH value of the water).

    The right time to fatliquor the hydrated leather is to allow moisture to be extracted with absorbent cotton towel (you will see the soiling that has been absorbed now released, reapply hydrator and towel extract until towel shows clean prior to fatliquoring it.

    Fatliquoring will follow the same technique of cling wrapping and dwelling so that moisture goes one way into the leather structure rather than evaporated wasted away.

    Now if you like the leather scent of the Leather Scent-B; then you would be happy with the leather scent infused fatliquor known as Fatliquor LS-5.5. This has double the strength of the leather scent-B; and since it is absorbed into the leather rather than staying on the surface it will be longer lasting in retaining the leather scent.

    It is always the preparation work that is more tedious than the actual work itself – which we call it “preconditioning” and here in fact the hydrator does more of the work for an effective fatliquoring; to be hydrogen-bond with the protein leather fibrils in the molecular level our eyes can’t see.

    If we know how things work, result can be predictably accurate.

    The basic leather is the same, from auto to garment and everything leather.

    It is the variation of leather fashions that makes it different.

    Roger Koh
    [email protected]
    Last edited by Roger Koh; 12-07-2010 at 05:19 PM.

  4. #4
    Join Date
    Dec 2010
    Posts
    15

    Default

    Quick update here. I've had the spots covered with hydrator and wrapped overnight. Then, unwrapped today to find the leather VERY hydrated. Some of the spots that had the cling wrap tight on the surface (Not wrinkles) had a small film of Hydrator left. The other wrinkled areas were dry. The leather has a very moist soft and smooth feeling. More of a smooth slippery feeling than I'd wish for an end result, but now we'll see how the Fatliquor sinks in. I've rewrapped the areas with Fatliquor applided. It is nice the Fatliquor is white so we are able to see consistent application.

    On another note, I can't get enough of the leather scent.

    Here's a couple pictures of the current status. It is much harder to get the cling wrap applied without having any wrinkles than I anticipated.
    Attached Images Attached Images      

  5. #5
    Join Date
    Feb 2007
    Location
    Greater Vancouver, Canada.
    Posts
    5,130

    Default

    Tips:

    Prior to applying the fatliquor; since due to air bubbles that may cause uneven absorption – spray Hydrator-3.3 (or rather apply by using the foam brush to avoid overspray) agitate with horsehair brush and extract with cotton towel until towel shows clean. By so doing you achieve dual purpose; first is to even out the surface absorbency; and second is to extract any soiling that the Hydrator-3.3 has wick up to the surface.

    Hydrator-3.3 and Fatliquor-5.0 are both odorless (unless you used leather scent infused fatliquor – that will be Fatliquor LS-5.5, especially if you have an odor issue or fatliquoring the leather more for the leather scent than for the softness).

    One way to get rid of the air bubbles and lay it flat is; lay an appropriate paper sheet (bigger than the 60ml/2oz bottle) over the cling wrapper and using the same bottle to smoothen over it.

    You may want to spray over a tissue paper to hold the Hydrator-3.3 or the Fatliquor-5.0 as a reservoir; so that this amount will eventually seep into the micro-cracks (can’t be seen with our naked eyes) overnight. Cling wrapping assures you that the moisture has gone one direction – into the leather structure.

    When the cling wrapper is removed – check with a spray of Hydrator-3.3 and agitate with horsehair brush – any residue that strays on the leather surface will again turn white – agitate and drive these strays into the leather structure again. Doing so before the next other steps of application is important as the strays fatliquor lying on top of the leather surface is useless and does not serve any purpose; that may cause adhesion problem for other coating application.

    The average thickness of upholstery leather is 1mm (average 12 sheets of newsprint) in thickness.
    And the whole structure is just like sponges; when new they are spongy with full airspaces and when old it collapse; nothing can be done with these sponges that gets thinner as its age.

    Unlike leather, when old leather is hydrated; it shrink dimensionally (reduce wrinkle stretch) and increase in thickness.
    And when "ionic charged" fats and oils are “hydrogen-bonded” (the (+) cationic ionic charges of the fibrils attract the (-) anionic charges of the fatliquor; thus to say how the leather gain in volume by hydrogen bonding instead of stuffing, thus increase in fullness).

    That’s the meaning of rejuvenation; and among all fabric material, this phenomenal can only happen to leather.

    And among all fabric material, leather has a moisture content of 14%; not found in any other material.

    When leather is kept at this 14% moisture (dry at use) with fatliquor; it will outlive our life with usefulness – that may be one of the many unexplained reason why people like you and I are crazy about leathers.

    Roger Koh
    [email protected]
    Last edited by Roger Koh; 12-08-2010 at 11:55 AM.

  6. #6
    Join Date
    Dec 2010
    Posts
    15

    Default

    Thanks so much for teaching more and more about leather and leather care in these threads! I have learned all I know about leather through reading these threads..

    Another quick update: I took off one of the side bolsters' Fatliquor wrap and toweled it smooth and yet still damp. Then, let it sit for another hour and returned to find it feeling great! Unlike ajvee's seat, the Fatliquor is penetrating into my leather seats...at least I am pretty sure it is. The texture now that is less slippery than before, but not as grabby/draggy as directly after the Prep 7.7. With Roger's suggestion, I ordered the Leather Scent "D" with my kit instead of the Leather Scent "B" that I am trying now. "D" is supposed to leave more of a 'draggy' feel, where "B" is more 'buttery'.

    I'll keep the other spots and steering wheel wrapped with the Fatliquor for a couple more hours...or is it beneficial to leave it on for a couple days? It's been on for 7 hours now.

    Another update will follow around 11:00

Thread Information

Users Browsing this Thread

There are currently 1 users browsing this thread. (0 members and 1 guests)

Posting Permissions

  • You may not post new threads
  • You may not post replies
  • You may not post attachments
  • You may not edit your posts
  •