


>>> After reviewing the many posts available i am pretty sure i need the A5 kit. My question is doni need the eraser and prep4.4
#1
#2
#3
#4

 Senior Member
>>> After reviewing the many posts available i am pretty sure i need the A5 kit. My question is doni need the eraser and prep4.4
#1
#2
#3
#4
Junior Member
Roger it was a pleasure speaking with you. Guide me in ordering products and restoring these seats. I think I understand the basic principle behind your system but guidance is greatly appreciated.
Junior Member
So in response to your email I am ordering the A7 kit. This means I will probably need more guidance than I originally thought. Be gentle with me!!! I don't have a Phd in chemistry... just a firefighter
Senior Member
Here is my recommendation in restoring the seat.
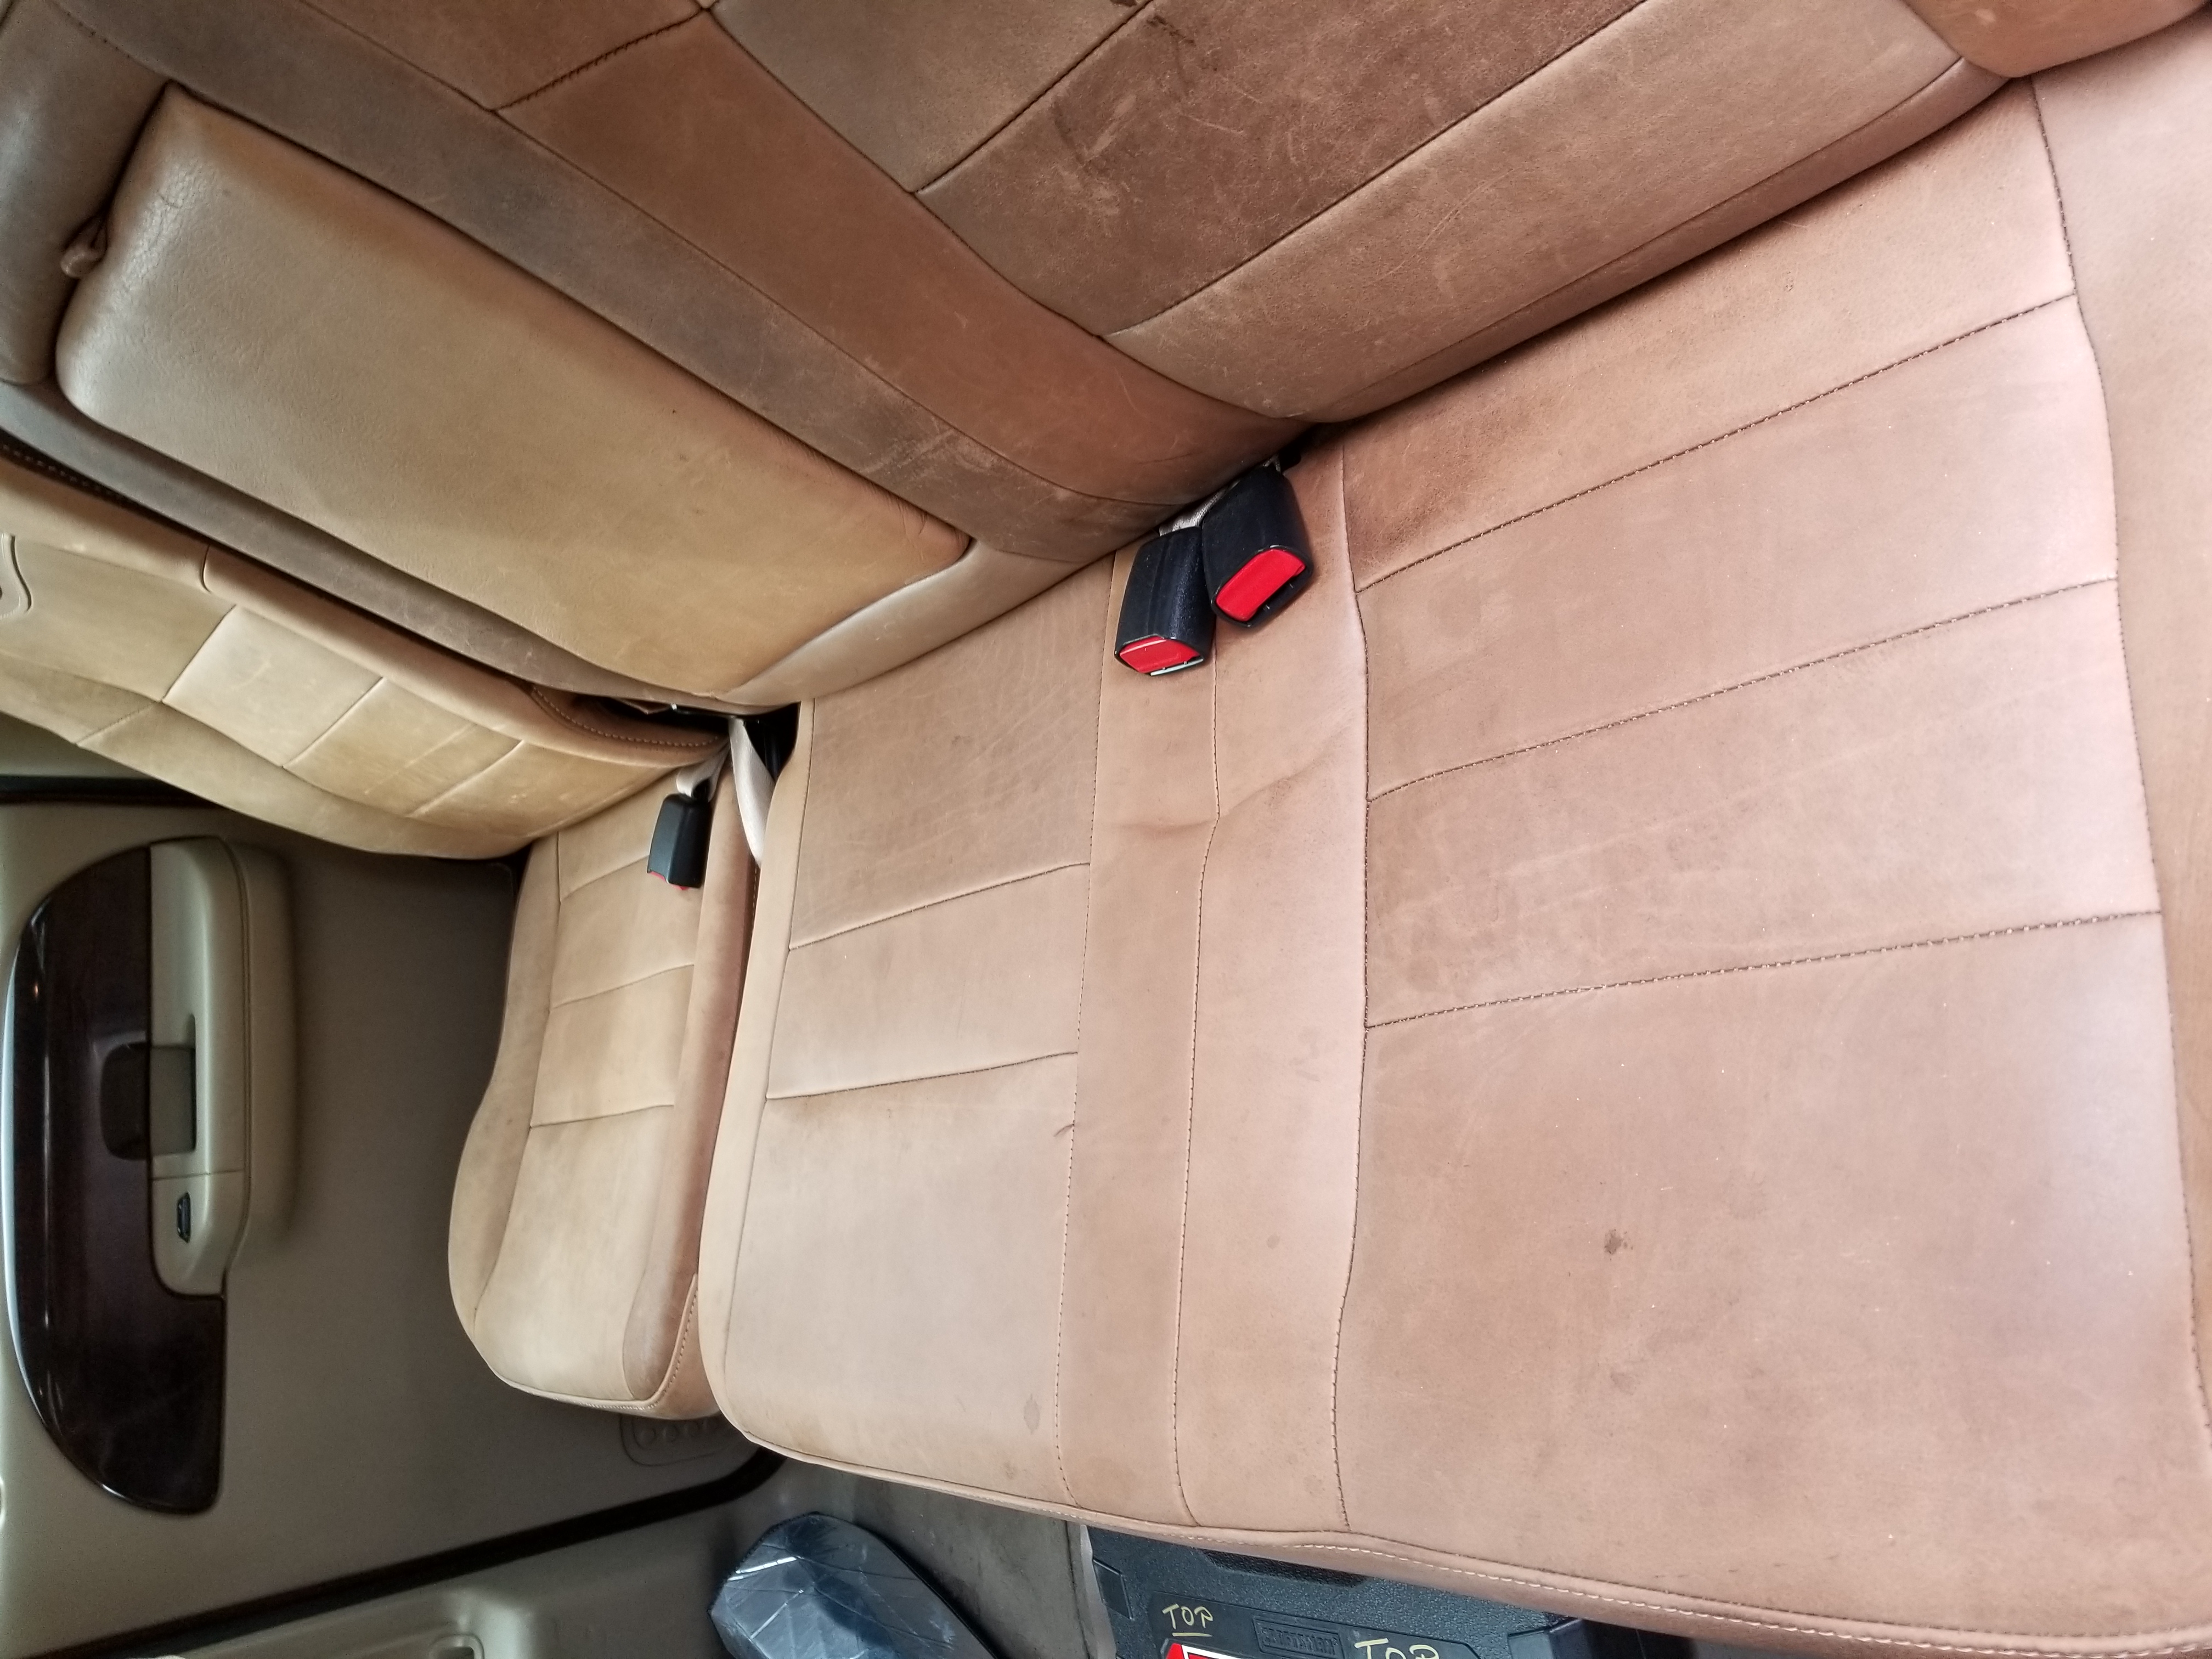
From pictures we can see that the soiling conditions vary, dryness of leather varies as well that manifest as cracks.
The utmost important is not to worsen the existing cracks. And soiling conditions is equally matched with corresponding products.
Picture #4.
I should say that these seats are generally lightly soiled with only a dark unknown spot.
I recommend cleaning only a section of the single seat either back or seat to experience how the leather response.
The sequence of steps is as follows:
Step-1 Dry Soil Removal:
Brush-1 > Eraser-4 > Vacuum system.
And a clean white cotton terry towel test, for soiling, to satisfaction.
Step-2 Preparatory Cleaning:
Prep-4.4 > Clean-3.8 > Rinse-3.0 > Acidifier-2.0 system.
Prep-4.4 is transfer to Brush-1 and brushed “very evenly” (without blotchiness, otherwise end result may reveal unwanted streaking) to entire surface and allows to dwell as long as possible or before it dries up. Clean-3.8 is to clean up sticky residue with help of Eraser-4 and Brush-1 and white cotton terry towel extract until towel shows clean. Rinse-3.0 follows the same procedure as a rinsing process free of suds to a squeaky feel. Test with fingers to detect any tackiness or sliminess, otherwise pH balance with Acidifier-2.0 to a healthy squeaky feel while the surface is still damp or about 25% total moisture content. Continue with Step-3 while the leather is still damp with Hydrating process.
Tips:
Must avoid the leather from going dry, before Fatiquoring (Fatliquoring is the end of this wet process, otherwise cracks may become worse from the lack of fatliquor - Fatliquor is the lifeblood of leather, replacing the original blood when the skin was alive)
Step-3 Hydrating Process:
Hydrator-3.3 system.
Hydrator-3.3 is applied to saturate the leather structure - for these reasons:
1st To flush out embedded or penetrated soiling.
2nd To relax the shrunk and separate the stick together leather fibrils
3rd To precondition prior to Fatliquoring, so that it will easily reach to the entire leather fibril structure for suppleness when dry.
The leather surface is brush and erase and towel extract until towel shows clean - any coloring is a good sign that the dyestuff is activated and intensify the surface fadings. If there is any sign of blotchiness (pH imbalanced), Acidifier-2.0 application would even out the appearance. Keep the leather at about 25% total moisture content or damp and proceed to Fatliquoring process.
Step-4 Fatliquoring Process:
Fatliquor-5.0 > Hydrator-3.3 system.
Fatliquor-5.0 is applied evenly with help of foamBrush-3 to saturate the leather with a milky surface. As the milky fatliquor is suck in and water content evaporates, more is applied until the absorption slow down. Let it slow dry and any sticky residue is clean up with Hydrator-3.3. When the surface is almost dry Eraser-4 begins to work and towel extract any remaining wick up soiling.
Step-5 Inspection:
The appearance is evaluated for cleanliness and the leather structure is tested for suppleness.
Step-6 Clear Topcoating:
AnilineTop-86G > AnilineTop-86S system
With satisfaction topcoat may be used, typically the gloss is used first then follows with luster adjustment with satin.
Topcoating will further intensify the beauty of depth, just as Hydrator-3.3 and Fatliquor-5.0 also contributed to the color intensity from fading.
Step-7 Dyeing Option:
Aniline-86 transparent coating dyestuff system as an option.
Step-8 Non-stick, Rub-resistant Protection.
Only with satisfaction that this last step is performed.
This should be the first trial; with experienced we can handle the other soiling category with much confidently.
Next I shall discuss how best to handle the unknown stain.
Before I end with Degreasing for picture #1 and #2.
Meanwhile, if you have any question.
Also look at this problem-solving guide.
If you see row E1 - the "darkening effect" , you see in picture # 1 and #2 above, you would need the minimum of "Vachetta-2.8" in the system and evaluate from there.
Vachetta-2.8 is found in this Kit-V4
http://www.leatherdoctor.com/kit-v4-...g-removal-kit/
or as an individual product here:
http://www.leatherdoctor.com/vachetta-2-8/
Roger Koh
Leather, Skin & Hair Care System Formulator
Consultant / Practitioner / Instructor / Coach
web: www.leatherdoctor.com
forum: www.leathercleaningrestorationforum.com
email: [email protected]
Last edited by Roger Koh; 10-23-2018 at 04:48 PM.
Junior Member
Thanks for the help. I will contact the previous owner and attempt to determine the liquid that stained the passenger seat. There is a little coffee on the carpet in front of the console so at this point I suspect coffee..
Senior Member
>>> I suspect coffee..
Coffee with milk or cream - see line B5 follows with B6 (compound stain) of above matrix.
If black coffee only then see only B6.
There are currently 3 users browsing this thread. (0 members and 3 guests)
 Posting Permissions
