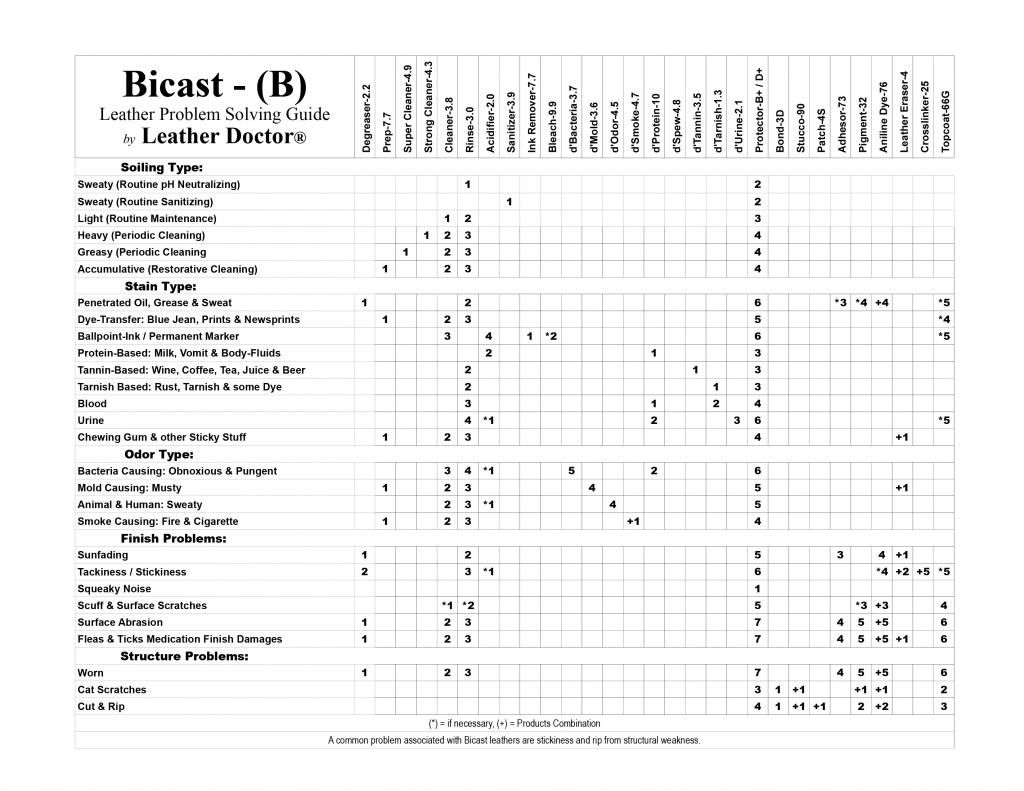
I am more inclined to believe that this set is “Bicast” (laminated) leather from the pictures and absorbency test.
However, because of the peculiar problems as shown in some of the pictures, we will have to treat it as “Aniline” leathers instead.
Some of the peculiarities mentioned with pictures are:
Pictures #2 - Rough on arms to, and top of seat (owner said it was near a window)
Pictures 3 - cracking on arm
Pictures #7 - front of cushions cracking
The rest of the pictures are common bicast problems.
Therefore, we shall use this Aniline Leathers Problem Solving Guide instead.
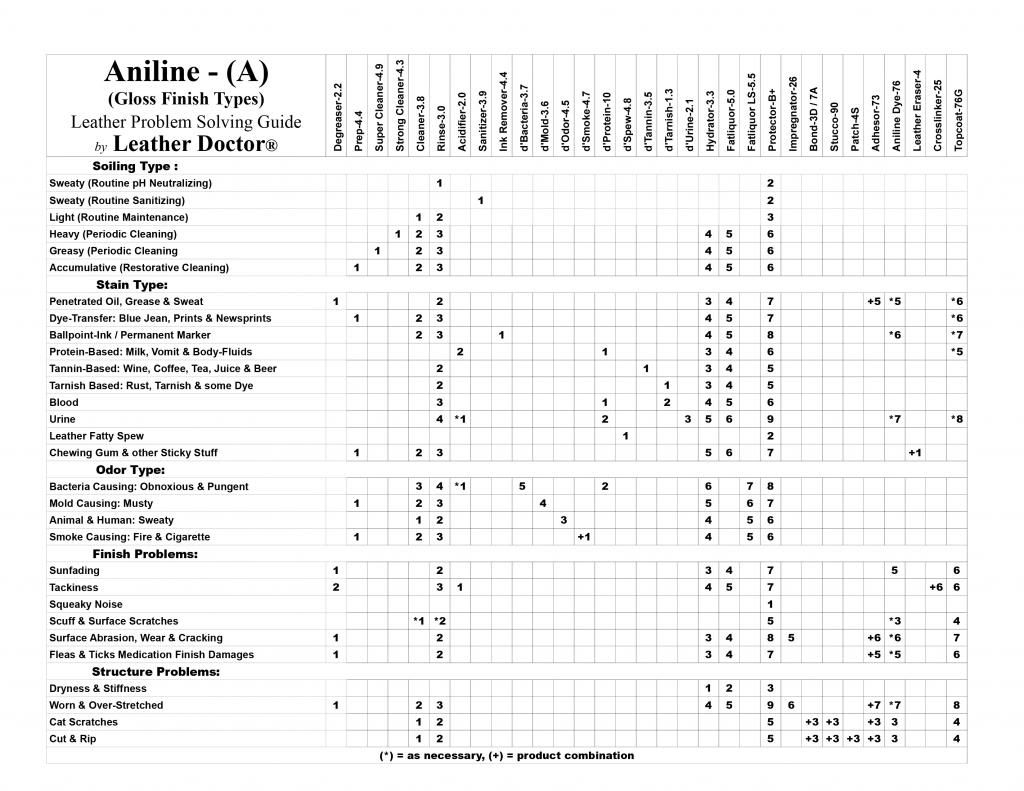
Leather-Safe Problem Solving Guide (A) – Aniline Leathers
Now, we shall run through the pictures and briefly go through what can be done.
Picture #1 - Some of the issues listed are on the other pieces as well as the one piece it is listed under.
This pictures shows the leather will require a restoration cleaning, besides there are scratches that will need color repairs as well.
Typical sequence of process involves:
1] Degreaser-2.2 > Rinse-3.0 (to remove foreign contamination)
2] Repairs scratches and color refinishing is an option with Aniline Dye-27 Antique Brown and Gloss Topcoat-79G.
3] Protection choice of B+ or D+
Picture #2 - Rough on arms to, and top of seat (owner said it was near a window)
This picture shows unusual condition, finish may have been completely damaged, and if it remains darker than the original color then the Antique “transparent” Dye-27 will not be able to camouflage it. Color intensity has to be darker than existing stains; perhaps Dark Brown may be ideal to solve the color evenness problem.
1] Degreaser-2.2 > Rinse-3.0 (to remove foreign contamination)
2] Tools to help in the removal will include horsehair Brush-1, leather Eraser-4 and sandpaper grit 1500/2000.
3] Color refinishing will depends on the outcome of the stains and color choice has to be able to hide or camouflage the stains.
4] Choice of Aniline Dye-27 > Topcoat-79G > Protection B+/D+.
Picture #3 - cracking on arm
This cracking of the leather will require rejuvenating for softness and strength follows with impregnation repairs.
1] Degreaser-2.2 > Rinse-3.0 (to remove foreign contamination)
2] Hydrator-3.3 > Fatliquor-5.0
3] Impregnator-26
4] Choice of Aniline Dye-27 > Topcoat-79G > Protection B+/D+.
Picture #4 Cut (has irregular edges like a tear, not like a slice) on seat back
This is structural repairs and it should be done after leather rejuvenating for suppleness.
1] Degreaser-2.2 > Rinse-3.0 (to remove foreign contamination)
2] Hydrator-3.3 > Fatliquor-5.0
3] Impregnator-26
4] Leather Bond-3D + Patch-4S
5] Choice of Aniline Dye-27 > Topcoat-79G > Protection B+/D+.
Picture #5 - lint sticking
Picture #6 - fabric impressions
These pictures show finish damage.
1] Degreaser-2.2 > Acidifier-2.0 (to remove foreign contamination)
2] Tools to help in the removal will include horsehair Brush-1, leather Eraser-4 and sandpaper grit 1500/2000.
3] Choice of Aniline Dye-27 > Topcoat-79G + Crosslinker-25 > Protection B+/D+.
Picture #7 - front of cushions cracking
This picture besides shows foreign contamination, the leather is dry of its original fatliquor that require replenishing.
1] Degreaser-2.2 > Rinse-3.0 (to remove foreign contamination)
2] Hydrator-3.3 > Fatliquor-5.0
3] Impregnator-26
4] Choice of Aniline Dye-27 > Topcoat-79G > Protection B+/D+.
Picture #11 – LOVESEAT
This picture shows wear to the finish into the leather.
1] Degreaser-2.2 > Rinse-3.0 (to remove foreign contamination)
2] Hydrator-3.3 > Fatliquor-5.0
3] Impregnator-26
4] Choice of Aniline Dye-27 > Topcoat-79G > Protection B+/D+.
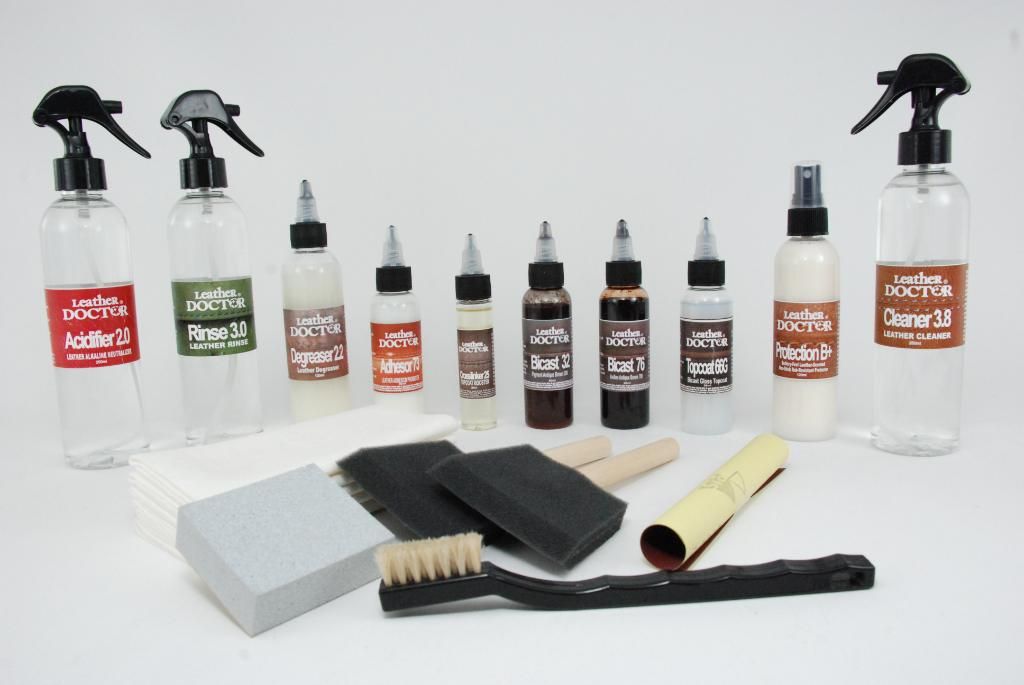
Products mentions are found in this kit A6.dr with necessary add on.
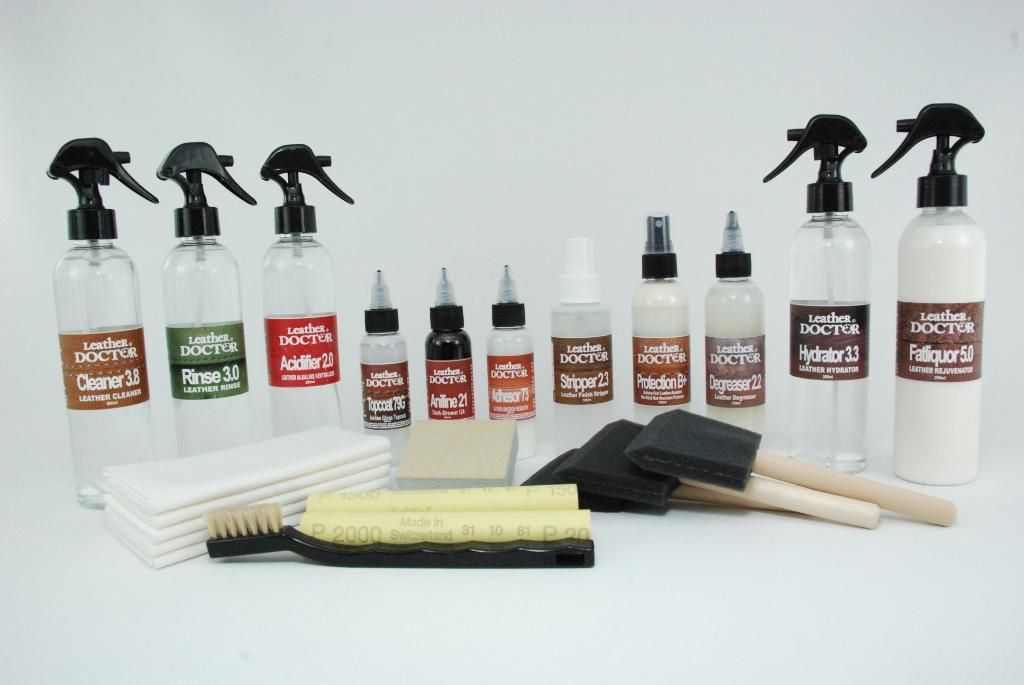
Leather Doctor® Kit A6.dr = Aniline Leather Care + pH Balance + Degreaser + Dyestuff + Topcoat
What do you think?
Roger Koh
[email protected]